

1. Intro
If you’ve used GitLab and Jira together, it’s easy to forget to manually transition tickets from one status to another. To never worry about this again, you can automate the process by integrating Jira with GitLab.
In this tutorial, I’ll take you through setting up this integration. The expected workflow: when a commit is pushed, the Jira issue moves from “To Do” to “In Progress,” and once the merge is completed, the issue transitions to “Done.”
2. GitLab Group and Project Setup
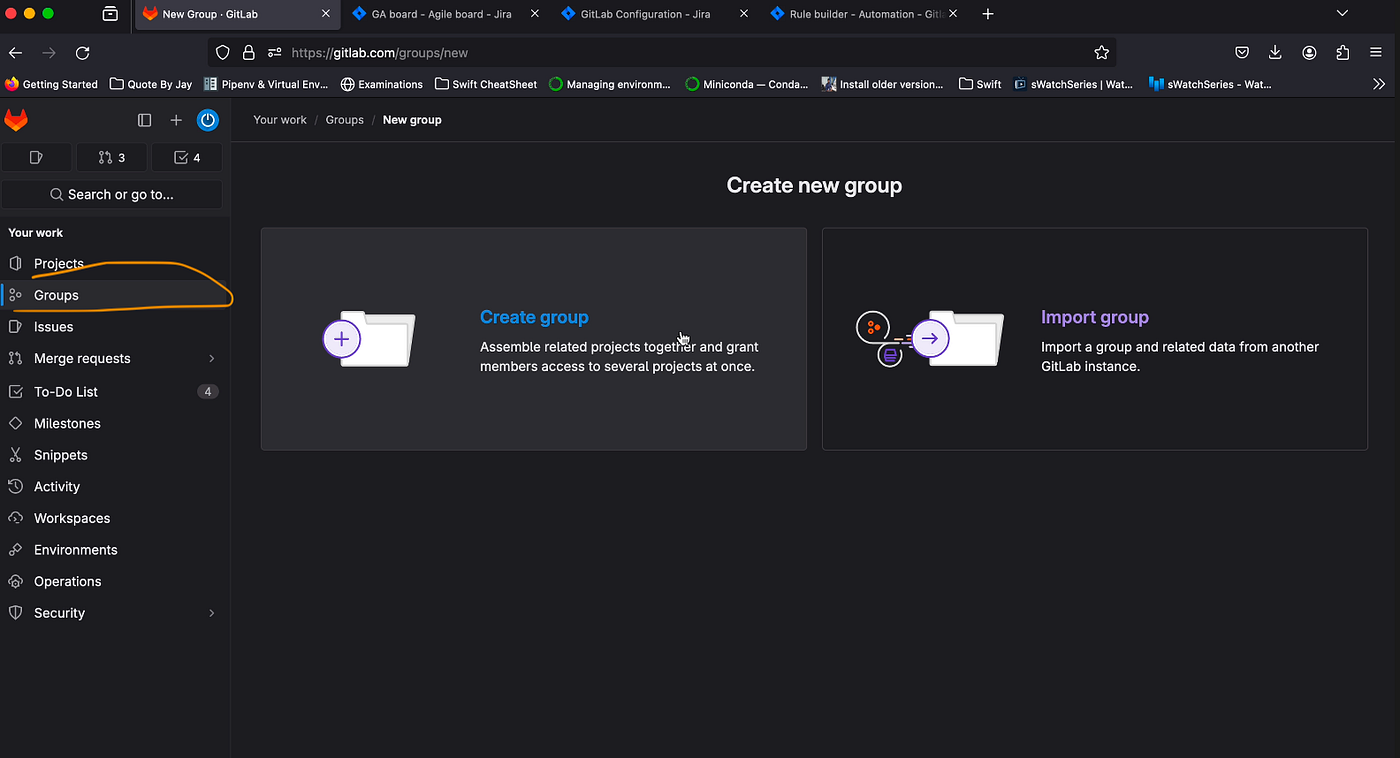
First, sign in to GitLab and create a group. Your project must be under a group for the integration to work. Later in the tutorial, we will link this group in Jira.
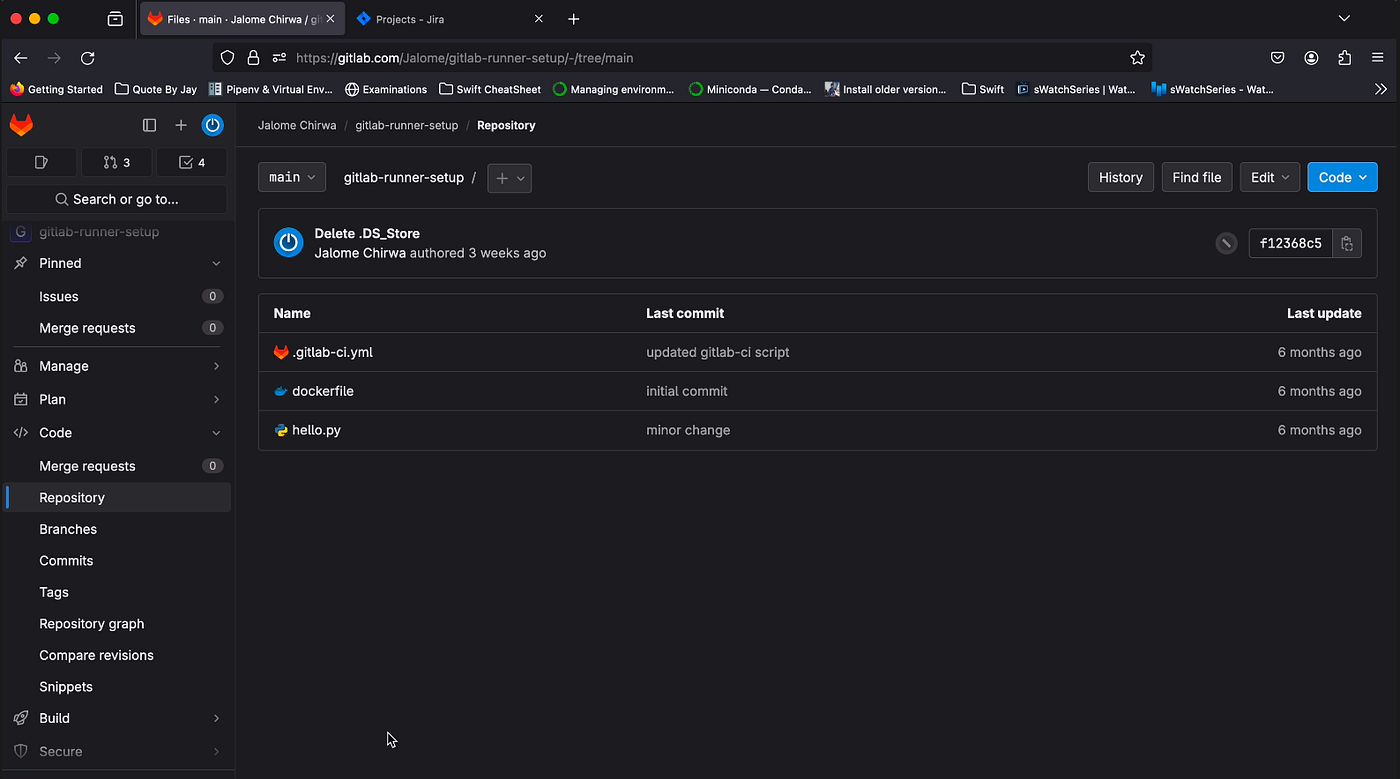
Next, create a GitLab project. I have an existing repository from a previous tutorial on setting up your own GitLab Runner. If you’re interested in learning more, you can visit this link.
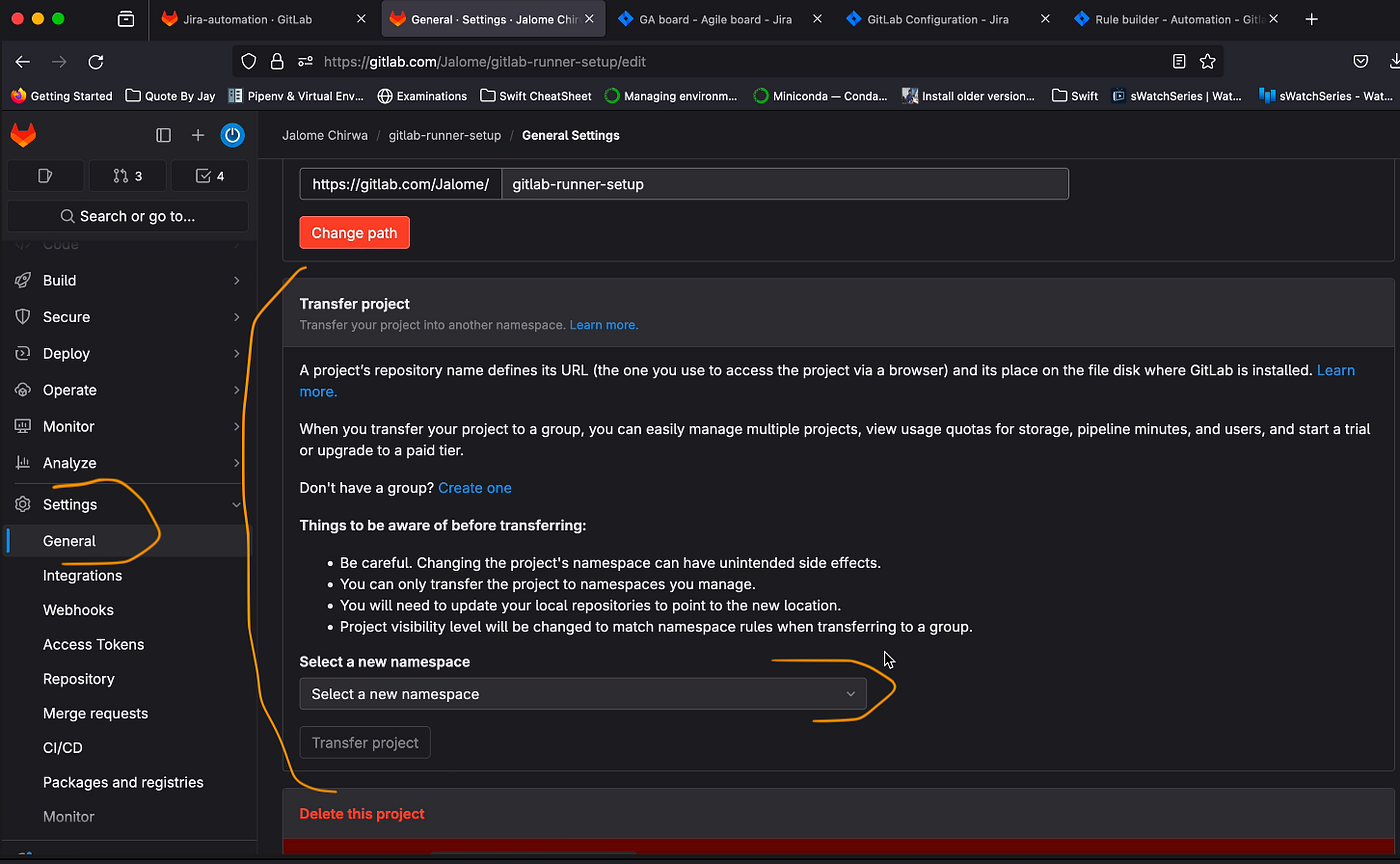
My project isn’t currently under a group, so I need to move it to the group I just created. To transfer a project, navigate to the project’s general settings. Under “Transfer Project,” select the group from the “Namespace” dropdown, then click “Transfer Project.”
3. Setting up Jira API token
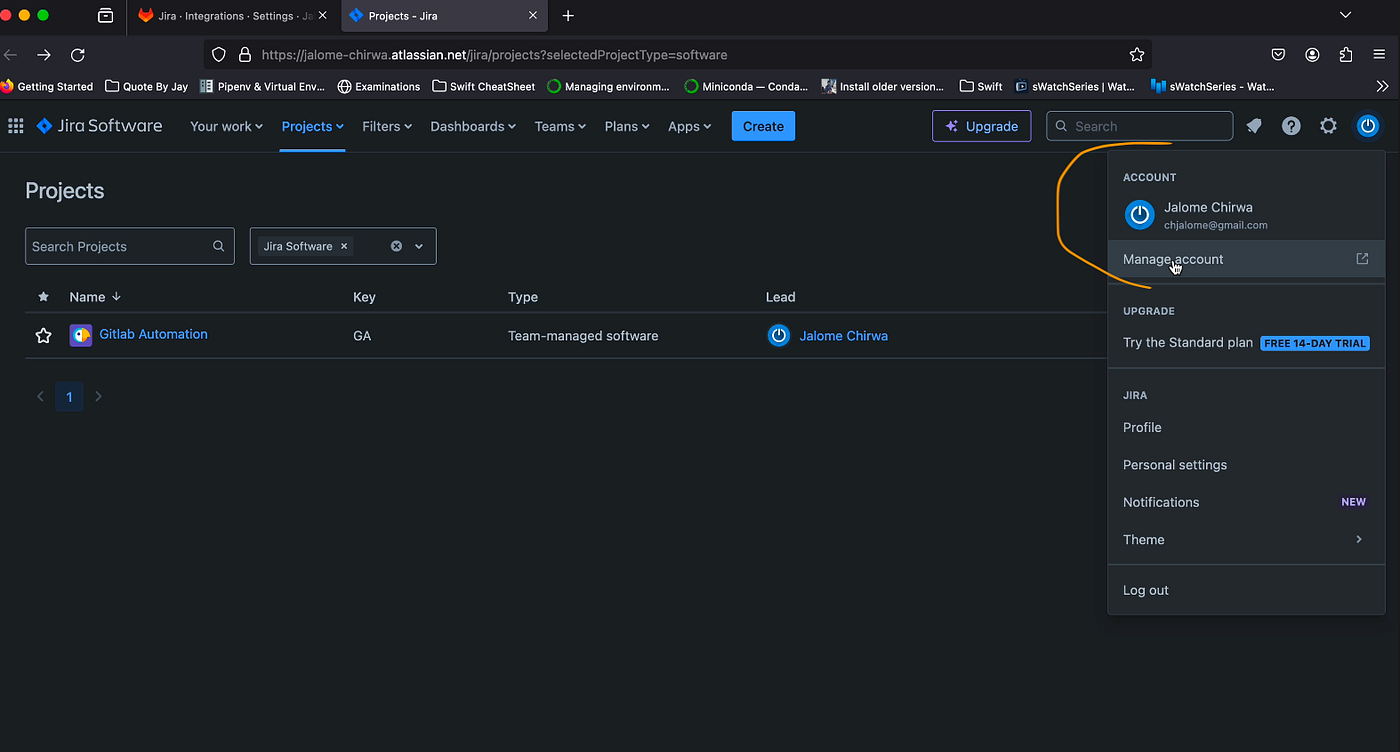
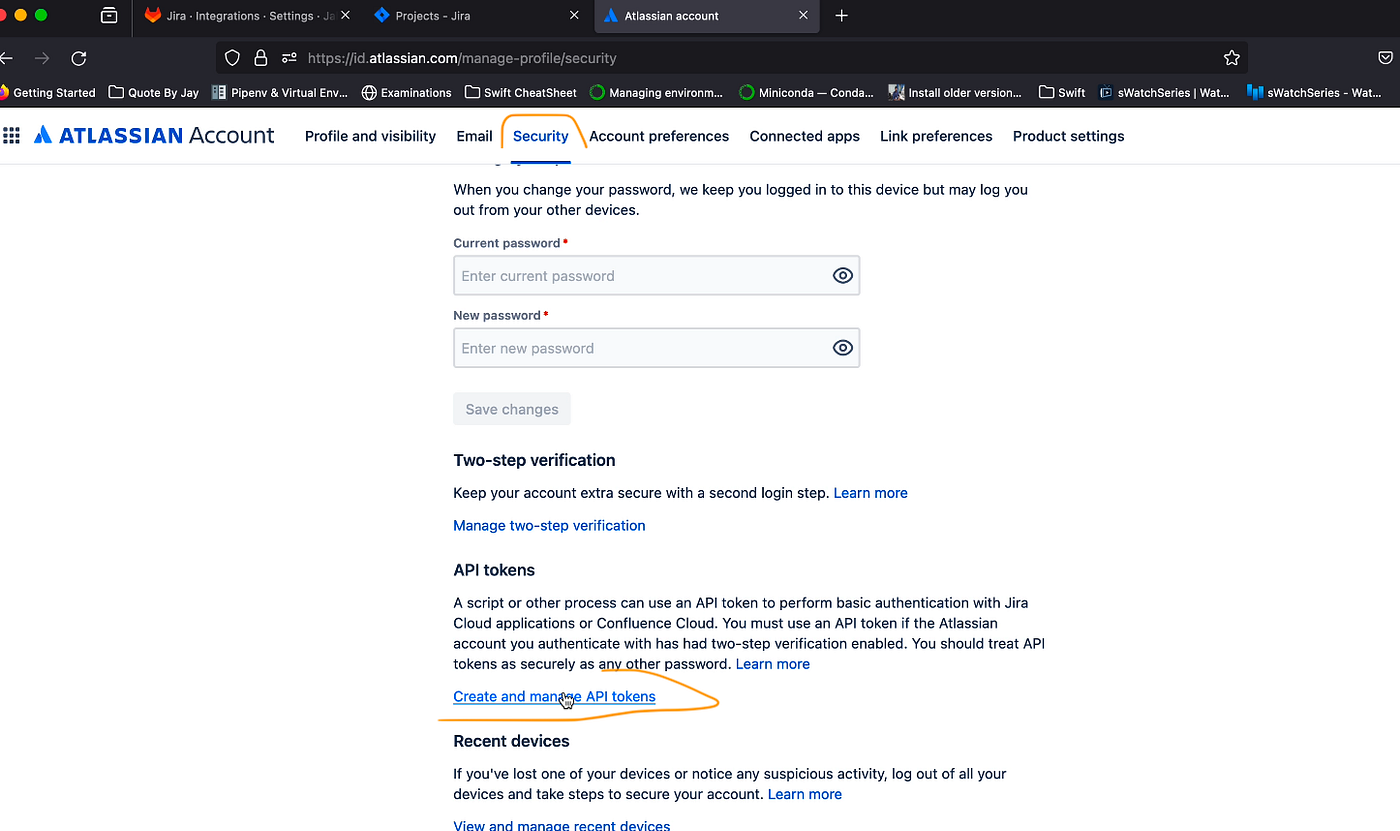
Next, head over to Jira to generate an API token, which will be required during the integration setup in GitLab. To create the token, click on “Manage Account” as shown in the image below, then navigate to the “Security” tab and click on “Create and manage API tokens.”
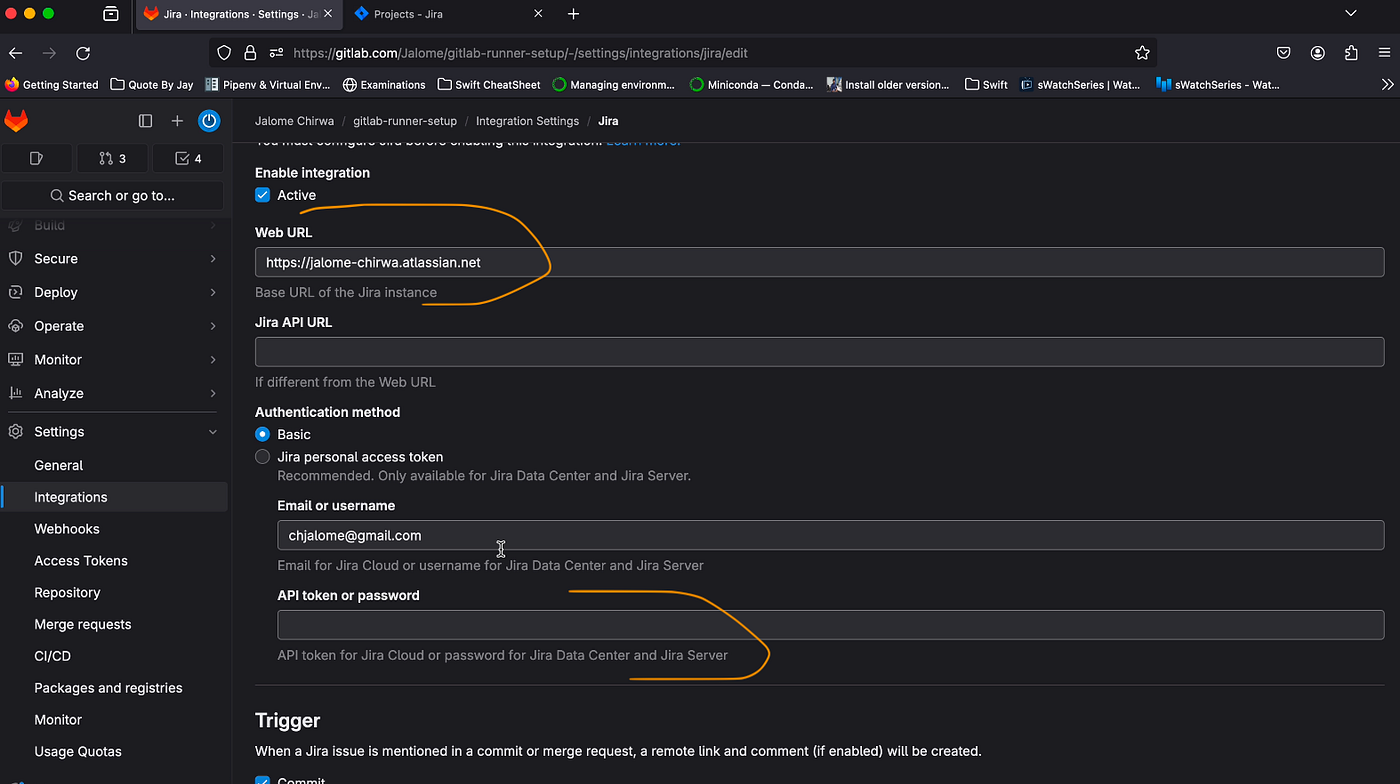
For the next step, navigate to your project’s integration settings in GitLab, as shown in the screenshot below, and select the Jira option.
Then, enter your Jira Base URL into the “Web URL” field and paste the API token generated in the previous step into the “API token or password” field. Test your settings to ensure the connection is working before saving the changes.
4. Setting up Jira automation rules
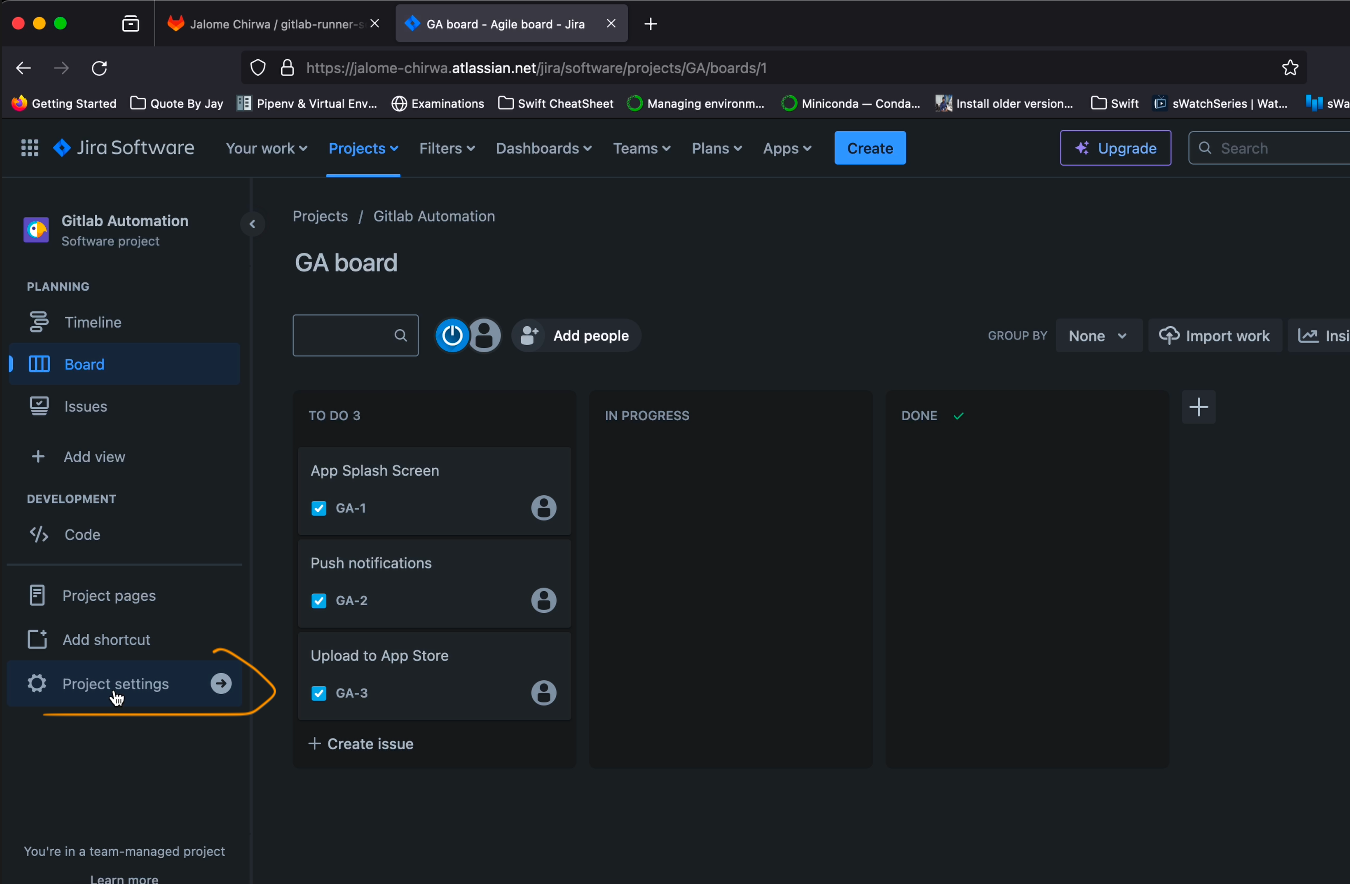
Now, return to Jira. I already have a project set up, but if you haven’t created one yet, please do so. My project board consists of three columns: To Do, In Progress, and Done, with three issues in the To Do column. To proceed, click on the project’s settings in the bottom left corner.
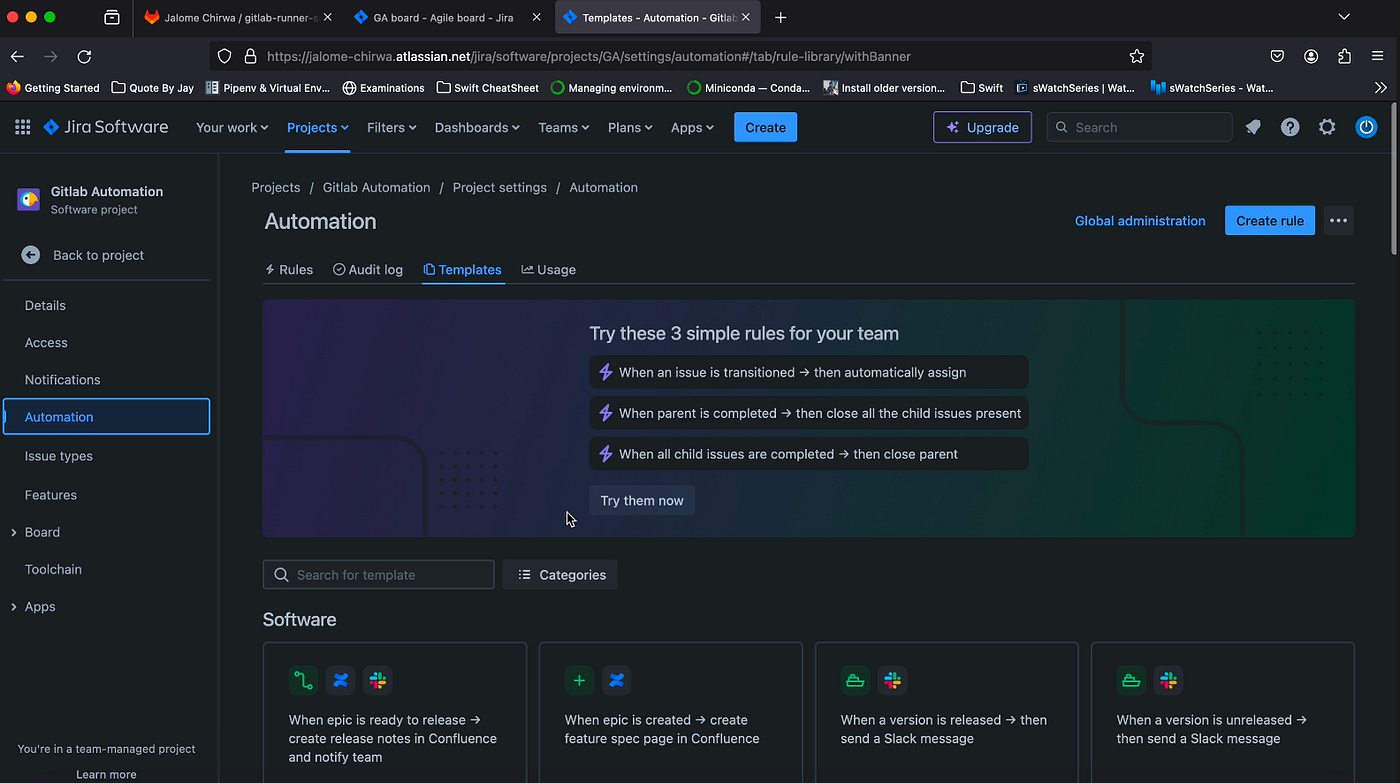
In the project settings page, click on “Automation” on the left-hand menu. This is where we’ll configure the transition rules. We’ll create an in-progress rule to transition an issue from “To Do” to “In Progress” when a commit is pushed. Go ahead and create a new rule.
4.1 GitLab for Jira Cloud app install and configuration
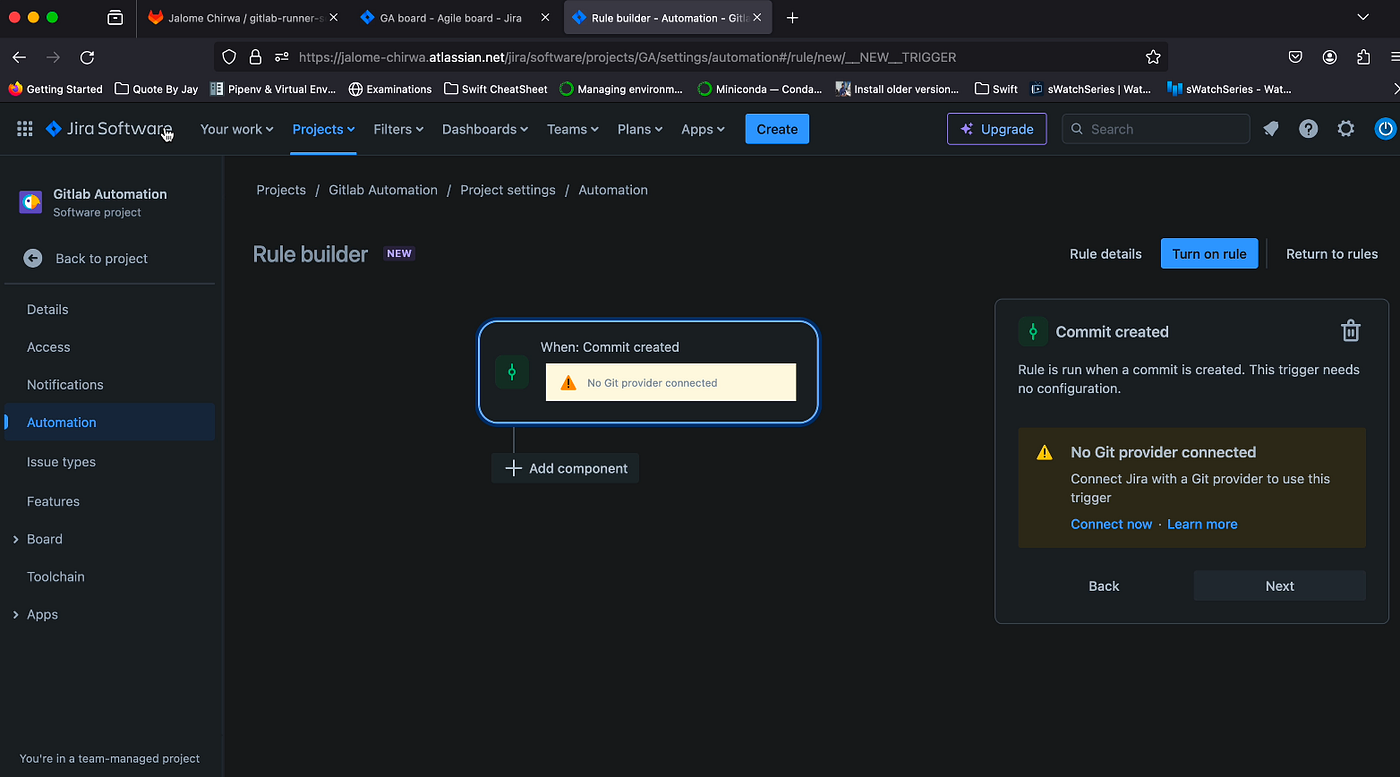
For the in-progress rule, the trigger will be set to “Commit Created.” Before proceeding with the rule setup, we need to connect Jira to GitLab. The Jira integration in GitLab has already been configured, we now need to link our GitLab Group in Jira. To do this, visit the Atlassian Marketplace and install the GitLab for Jira Cloud app.
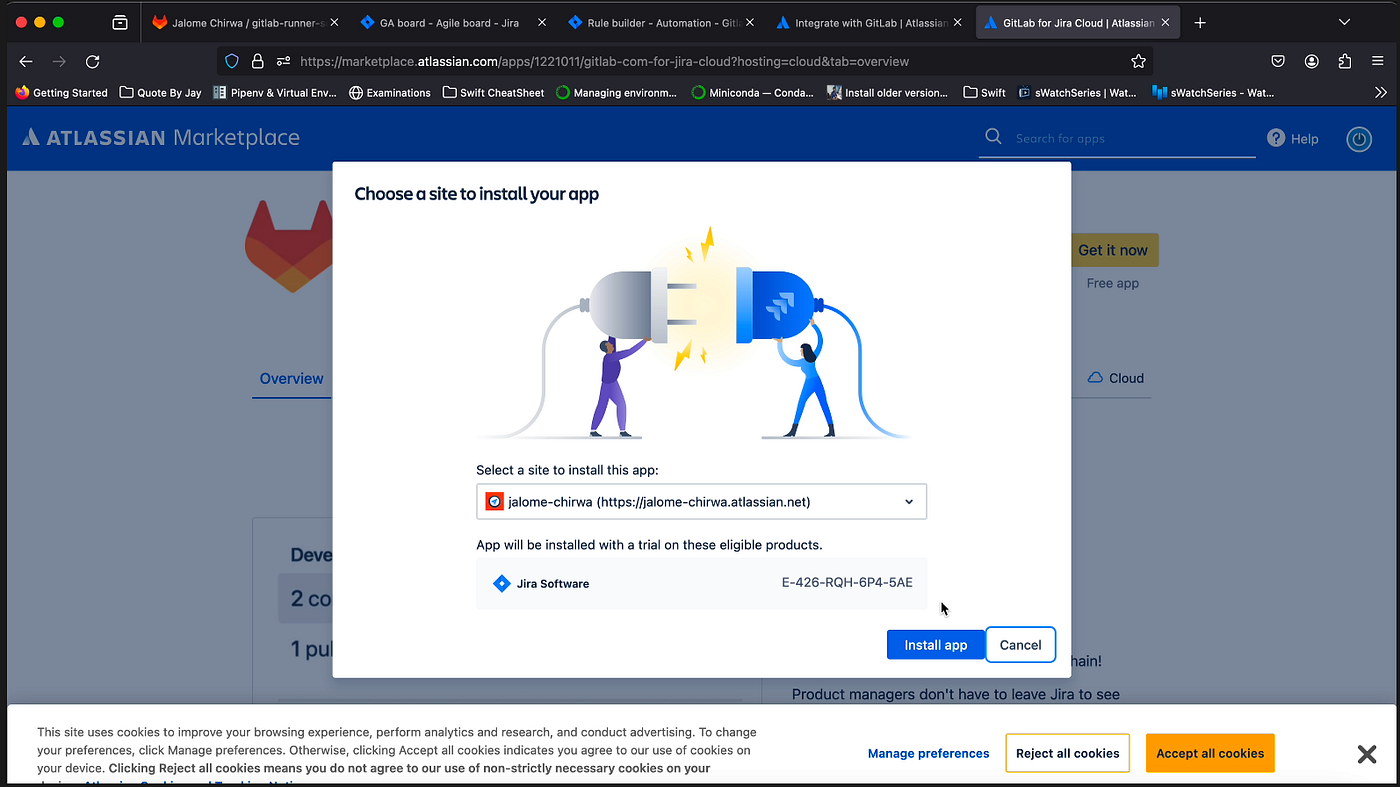
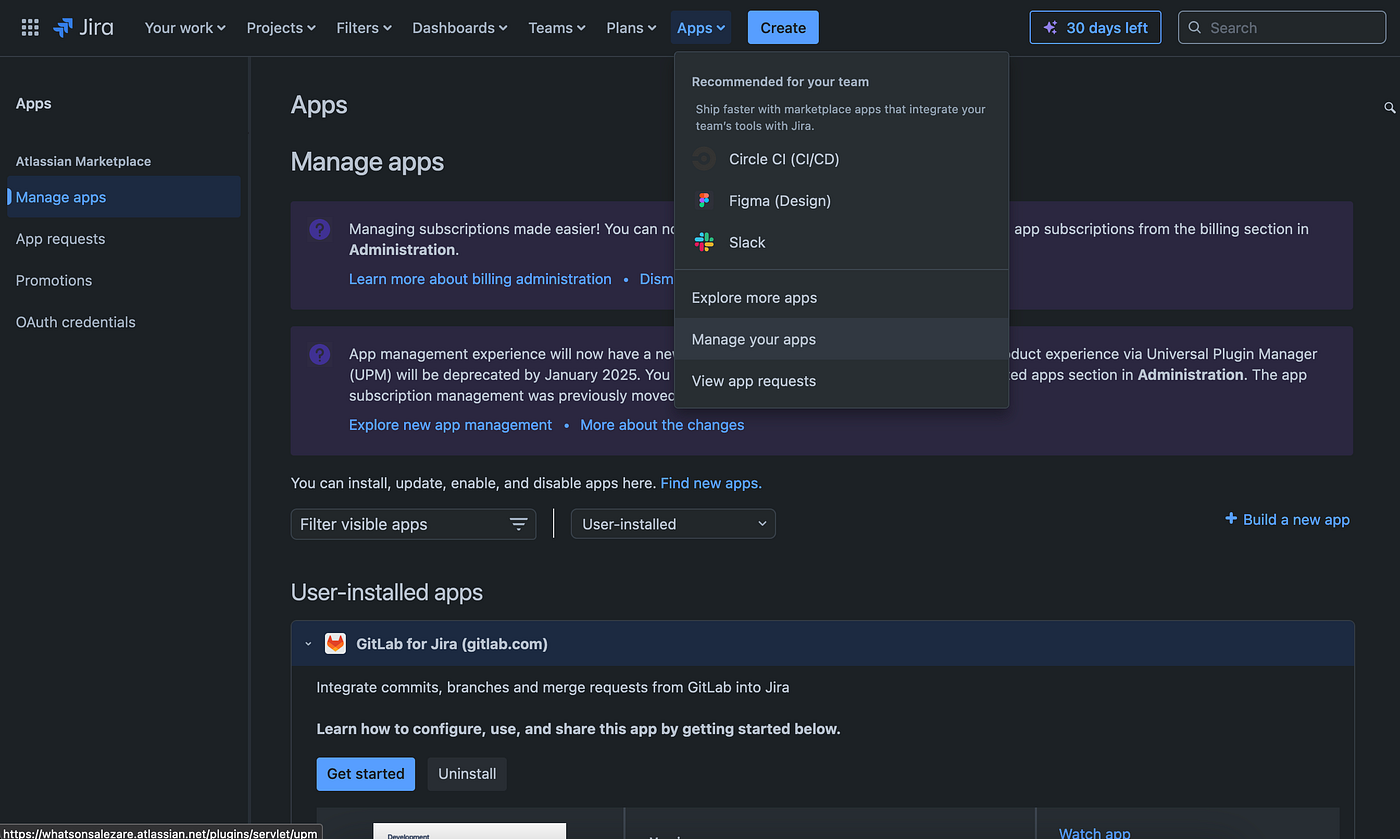
Proceed to install the app. Once the installation is complete, we can link Jira to the GitLab Group we created earlier. To do this, click on the app dropdown in the Jira menu bar and navigate to the “Manage Apps” page. Under “User Installed Apps,” click on the GitLab dropdown and then select the “Get Started” button.
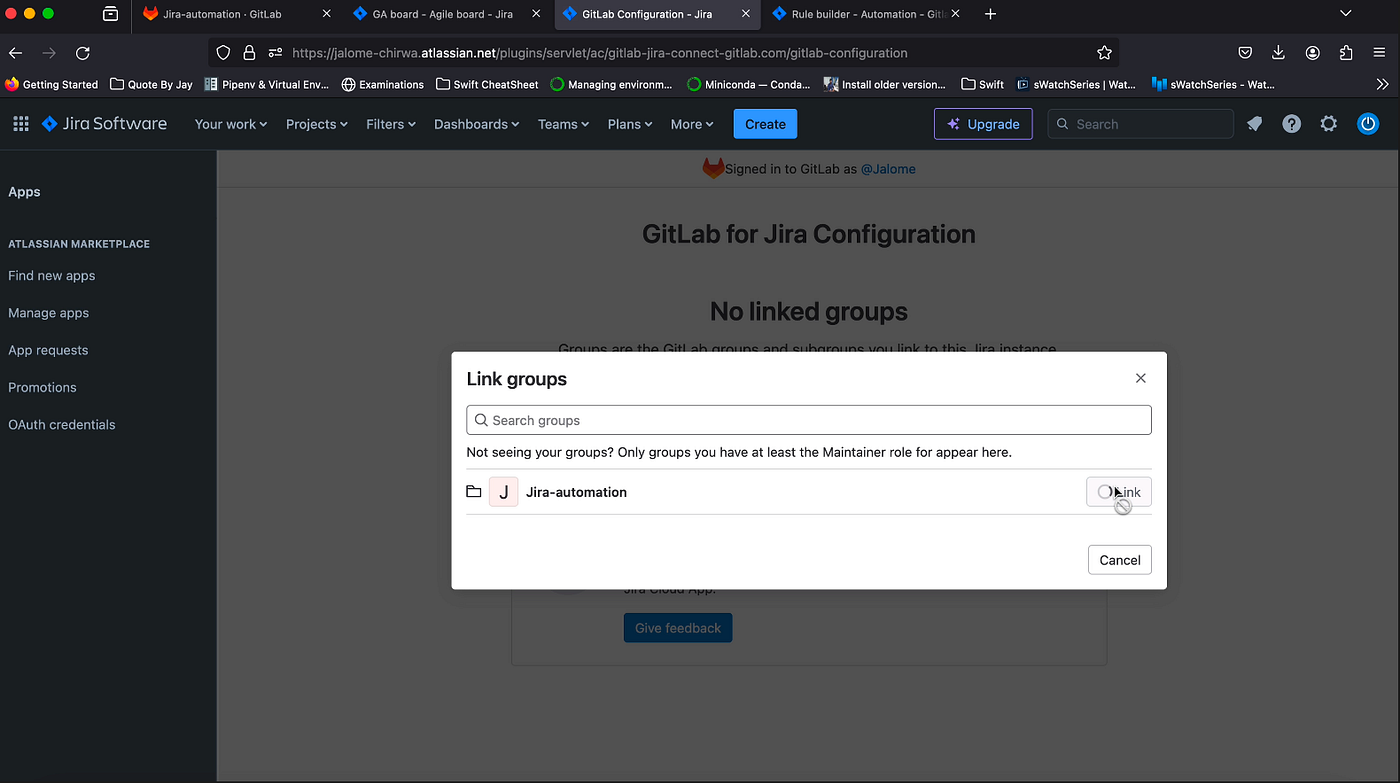
You will then be directed to the GitLab configuration page. Choose GitLab.com (SaaS) and sign in to GitLab to link your Group.
4.2 In-progress transition rule
Now head back to your project’s automation page to complete the rule setup. Once a commit is created or pushed to GitLab, we want a “Transition issue” action to occur. This transition action will move an issue to “In Progress” as shown in the image below.
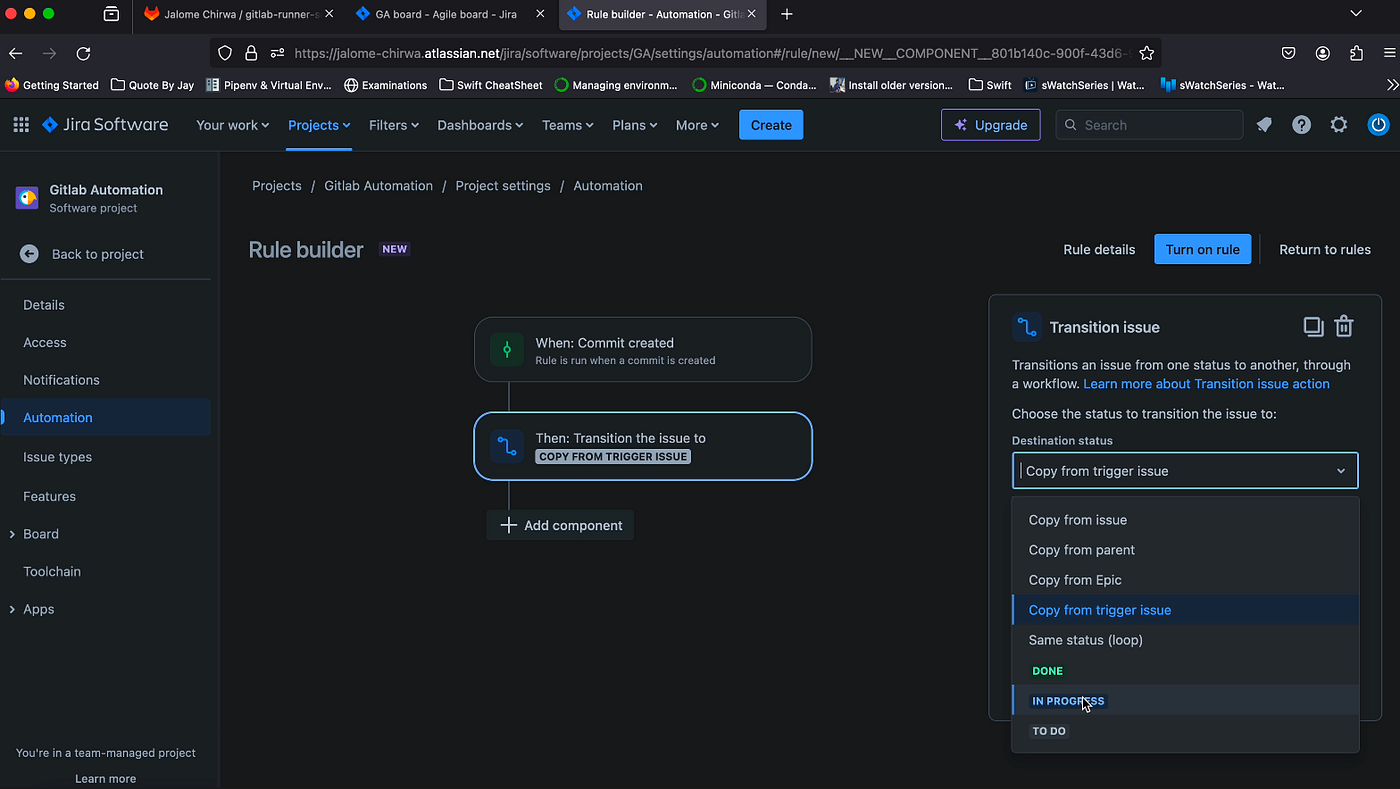
And that’s it for the in-progress rule. Click on the “Turn on rule” button and save your automation rule.
5. Testing transition rules
Finally, for this to work, your branch names and commit messages must include the Jira issue ID. For
example, your branch name should be formatted as GA-1-Notifications-Update, where
GA-1 is the issue ID. Your commit message should follow a similar format, such as
git commit -m "GA-1 updated notifications." and pushing the commit will trigger the
transition.