

1. Introduction
In this tutorial, I’ll be taking you through setting up the Firebase emulator for local development. The Firebase emulator will allow us to set up some of the Firebase services locally instead of connecting to a live Firebase project.
Over the next few tutorials, I’ll be going over the steps to set up Firebase Auth, Firestore, Functions, and Database using the Firebase emulator. In this tutorial, we’ll focus on Firebase Auth.
2. Pre-requisites
Please note that in order to run the emulator you’ll need Node.js (which can be downloaded from https://nodejs.org/) and the Java JDK installed on your machine. I’m using the Zulu OpenJDK on my Mac machine, you can install the same version using Homebrew by running the following commands:
brew tap homebrew/cask-versions
brew install --cask zulu11
If you’re on a different OS please refer to this section of the Firebase documentation: https://firebase.google.com/docs/emulator-suite/install_and_configure
3. Set up the Firebase project
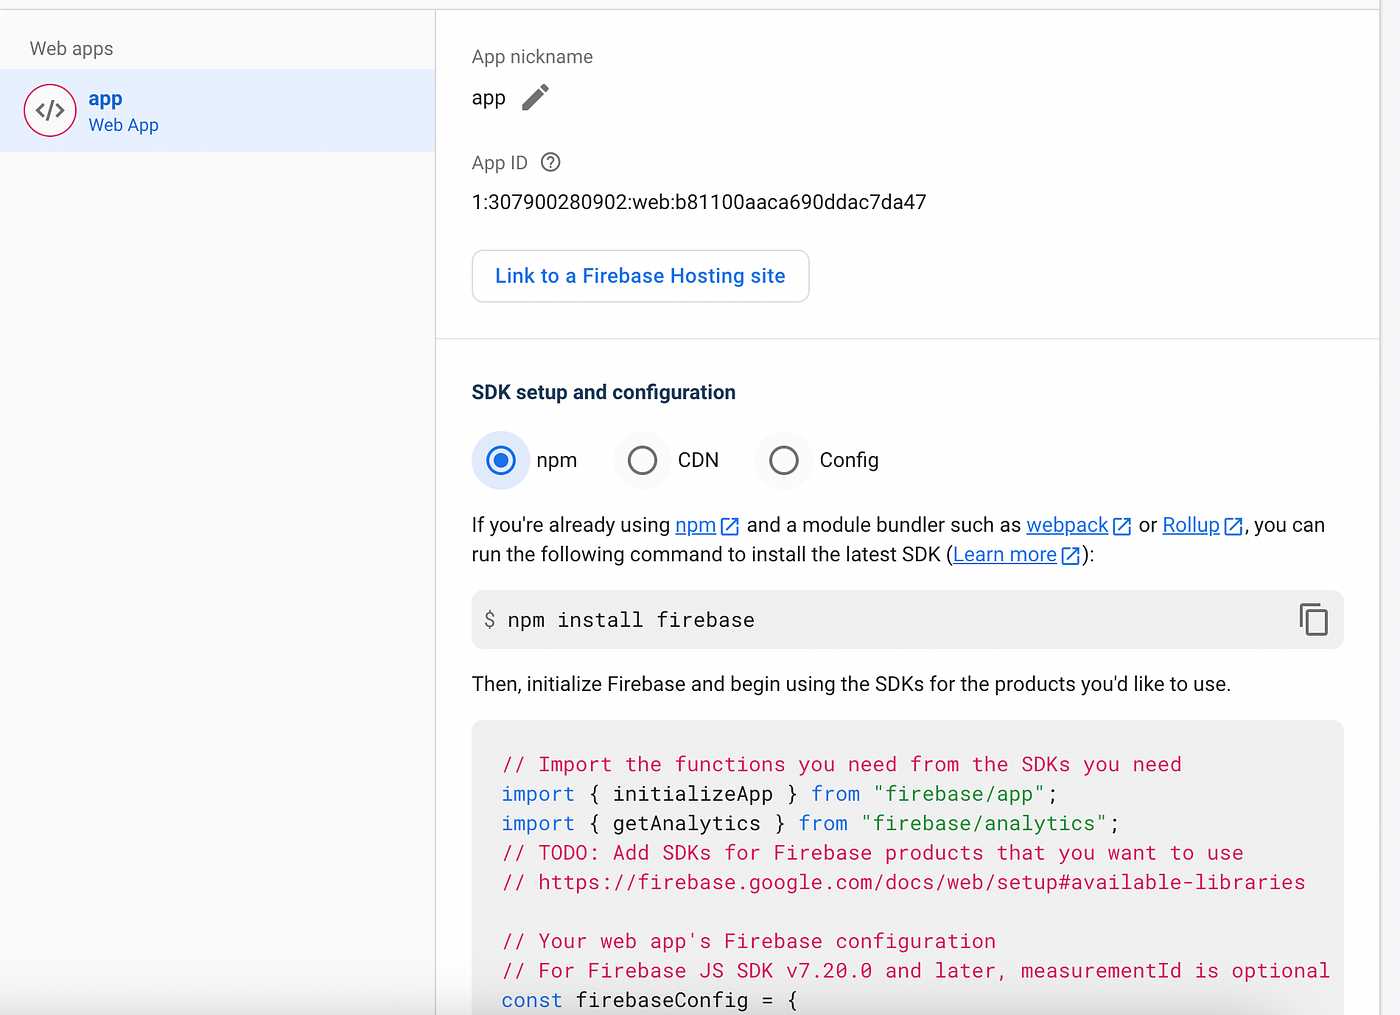
Let’s go ahead and set up a Firebase project in the Firebase console. Go to the Firebase console and create a new Firebase project. Once the project is created, go ahead and create a web application, we’ll use the app config later in this tutorial.
4. Running the Emulator
Next, install the Firebase CLI. The Firebase CLI is a command-line tool that allows you to interact
with Firebase from your terminal. You can install it using the following command: npm
install -g firebase-tools.
And then run the following command to log into your Firebase account: firebase
login.
This will authenticate you with Firebase and allow you to use the Firebase CLI.
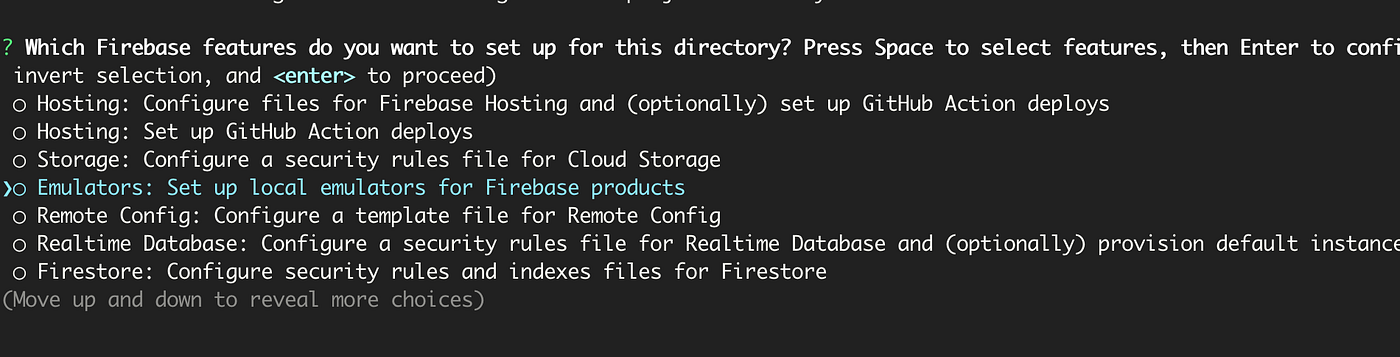
We’ll then Initialize a Firebase project using: firebase init
Select Emulators and use an existing Firebase project. This will allow you to set up the Firebase emulator with the services you want to use, such as Auth and Firestore. Make sure to select the Firebase project you created earlier when prompted. Next, select the services you want to include in your emulator set up such as Auth, Firestore, database, and functions.
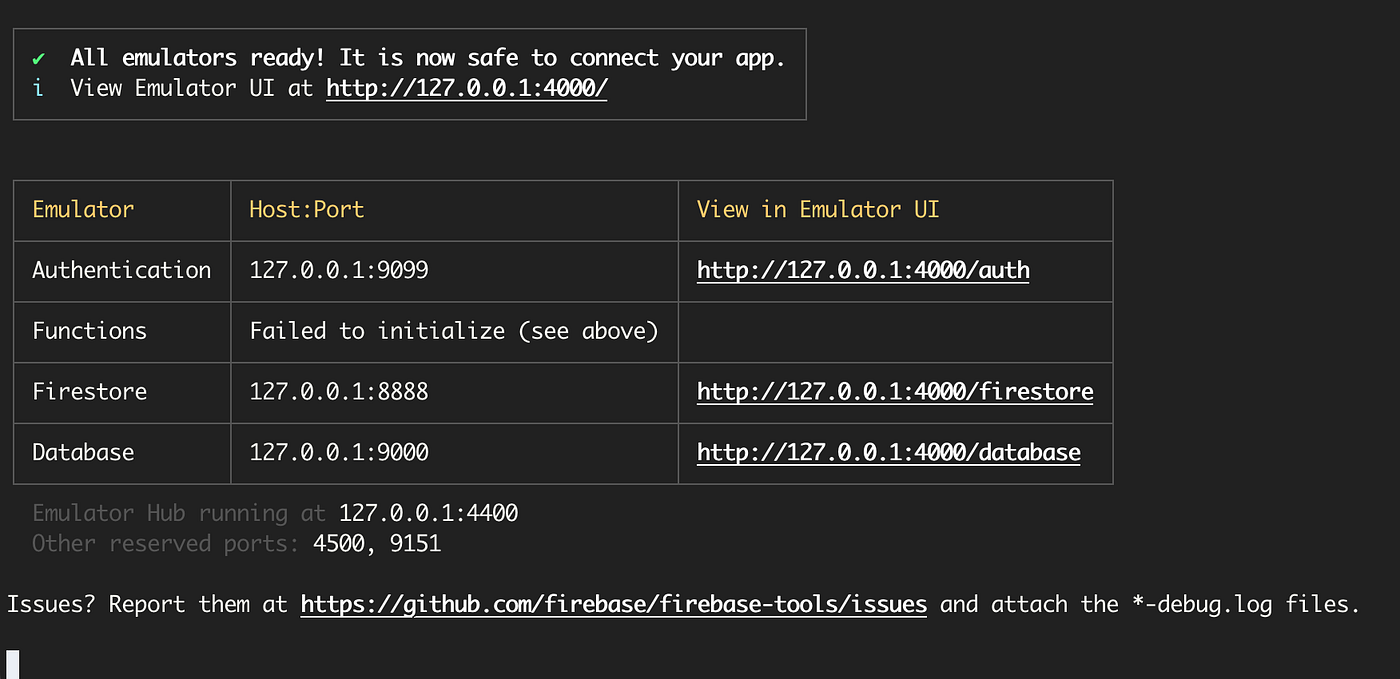
You should now be able to run the emulator using the following command: firebase
emulators:start.
5. Connecting to your emulator from a web or mobile app
Next, initialize a new JavaScript project and install the Firebase module. So this project could be
your web application, or mobile app, just to keep things simple we’ll set up a basic javascript
project that will connect to our Firebase emulator. Once the project is created, you can install the
Firebase module using the following command: npm install firebase.
In the package.json file add "type":"module".
In the index.js file let’s import initializeApp
from "firebase/app" and let’s also import
getAuth, connectAuthEmulator from "firebase/auth".
// import firebase
import { initializeApp } from "firebase/app";
import { getAuth, connectAuthEmulator } from "firebase/auth";
We’ll then initialize our Firebase project using the details of the web application we set up in our Firebase console.
// import firebase
import { initializeApp } from "firebase/app";
import { getAuth, connectAuthEmulator } from "firebase/auth";

// initialize firebase with your
// app credentials
const firebaseConfig = {
    apiKey: "",
    authDomain: "",
    projectId: "",
    storageBucket: "",
    messagingSenderId: "",
    appId: "",
    measurementId: ""
}

const app = initializeApp(firebaseConfig);
Next, let’s connect our authentication to the emulator.
// import firebase
import { initializeApp } from "firebase/app";
import { getAuth, connectAuthEmulator } from "firebase/auth";

// initialize firebase with your
// app credentials
const firebaseConfig = {
    apiKey: "",
    authDomain: "",
    projectId: "",
    storageBucket: "",
    messagingSenderId: "",
    appId: "",
    measurementId: ""
}

const app = initializeApp(firebaseConfig);

// connect to firebase emulator
const auth = getAuth()
connectAuthEmulator(auth,'http://127.0.0.1:9099');
So instead of passing the initialized app in our getAuth function, we’ll connect to the
emulator instead.
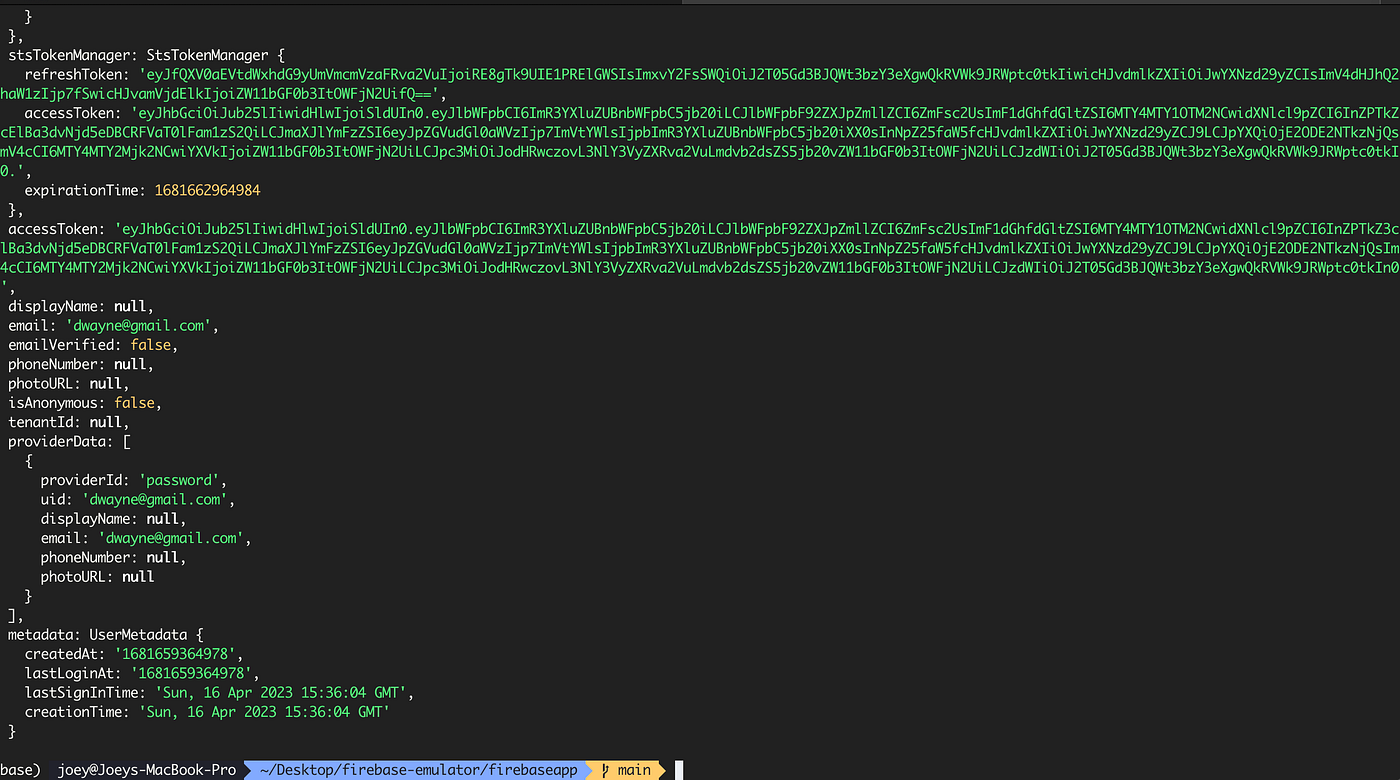
Lastly, we can now test out our implementation by creating users or signing in as existing users
using createUserWithEmailAndPassword and signInWithEmailAndPassword.
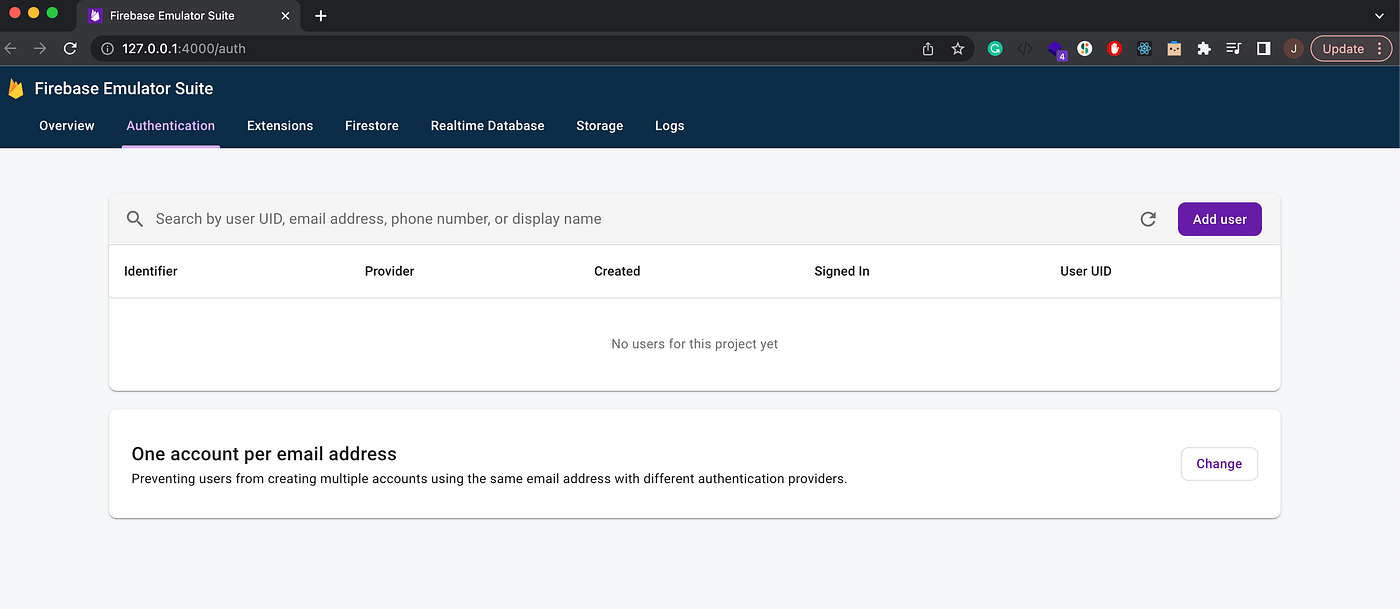
So let’s go ahead and create a new user. At the moment we don’t have any users.
// import firebase
import { initializeApp } from "firebase/app";
import { getAuth, connectAuthEmulator, createUserWithEmailAndPassword, signInWithEmailAndPassword } from "firebase/auth";
// initialize empty firebase
const firebaseConfig = {
apiKey: "",
authDomain: "",
projectId: "",
storageBucket: "",
messagingSenderId: "",
appId: "",
measurementId: ""
}
const app = initializeApp(firebaseConfig);
// connect to firebase emulator
const auth = getAuth()
connectAuthEmulator(auth,'http://127.0.0.1:9099');
// create new user
let email = "dwayne@gmail.com";
let password = "helloworld";
createUserWithEmailAndPassword(auth, email, password)
.then((userCredential) => {
// Signed in
const user = userCredential.user;
console.log(user)
// ...
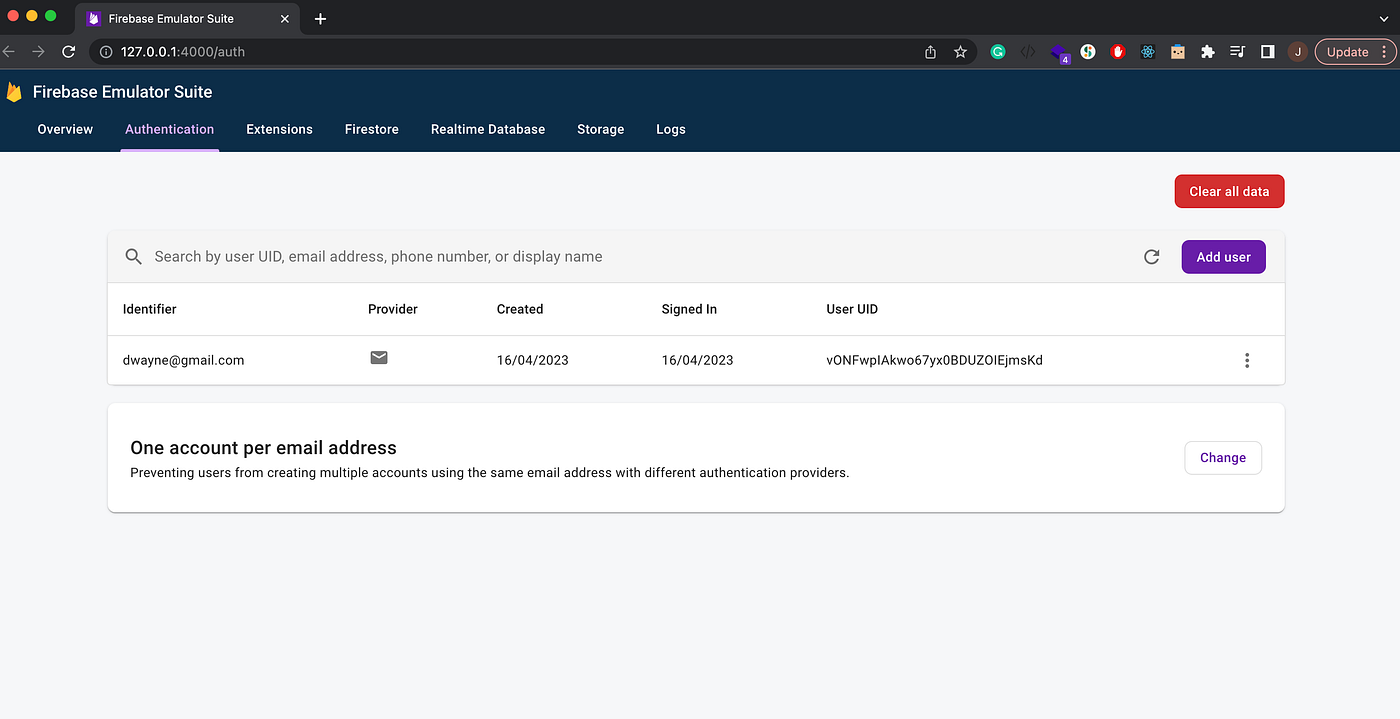
})Now if you run the app using the command node index.js it should create
this user and we can check the emulator to confirm.
And That’s it! Using the emulator, you can test your Firebase project locally and make sure everything is working as expected before deploying to dev or production.